tomato + italian sausage risotto

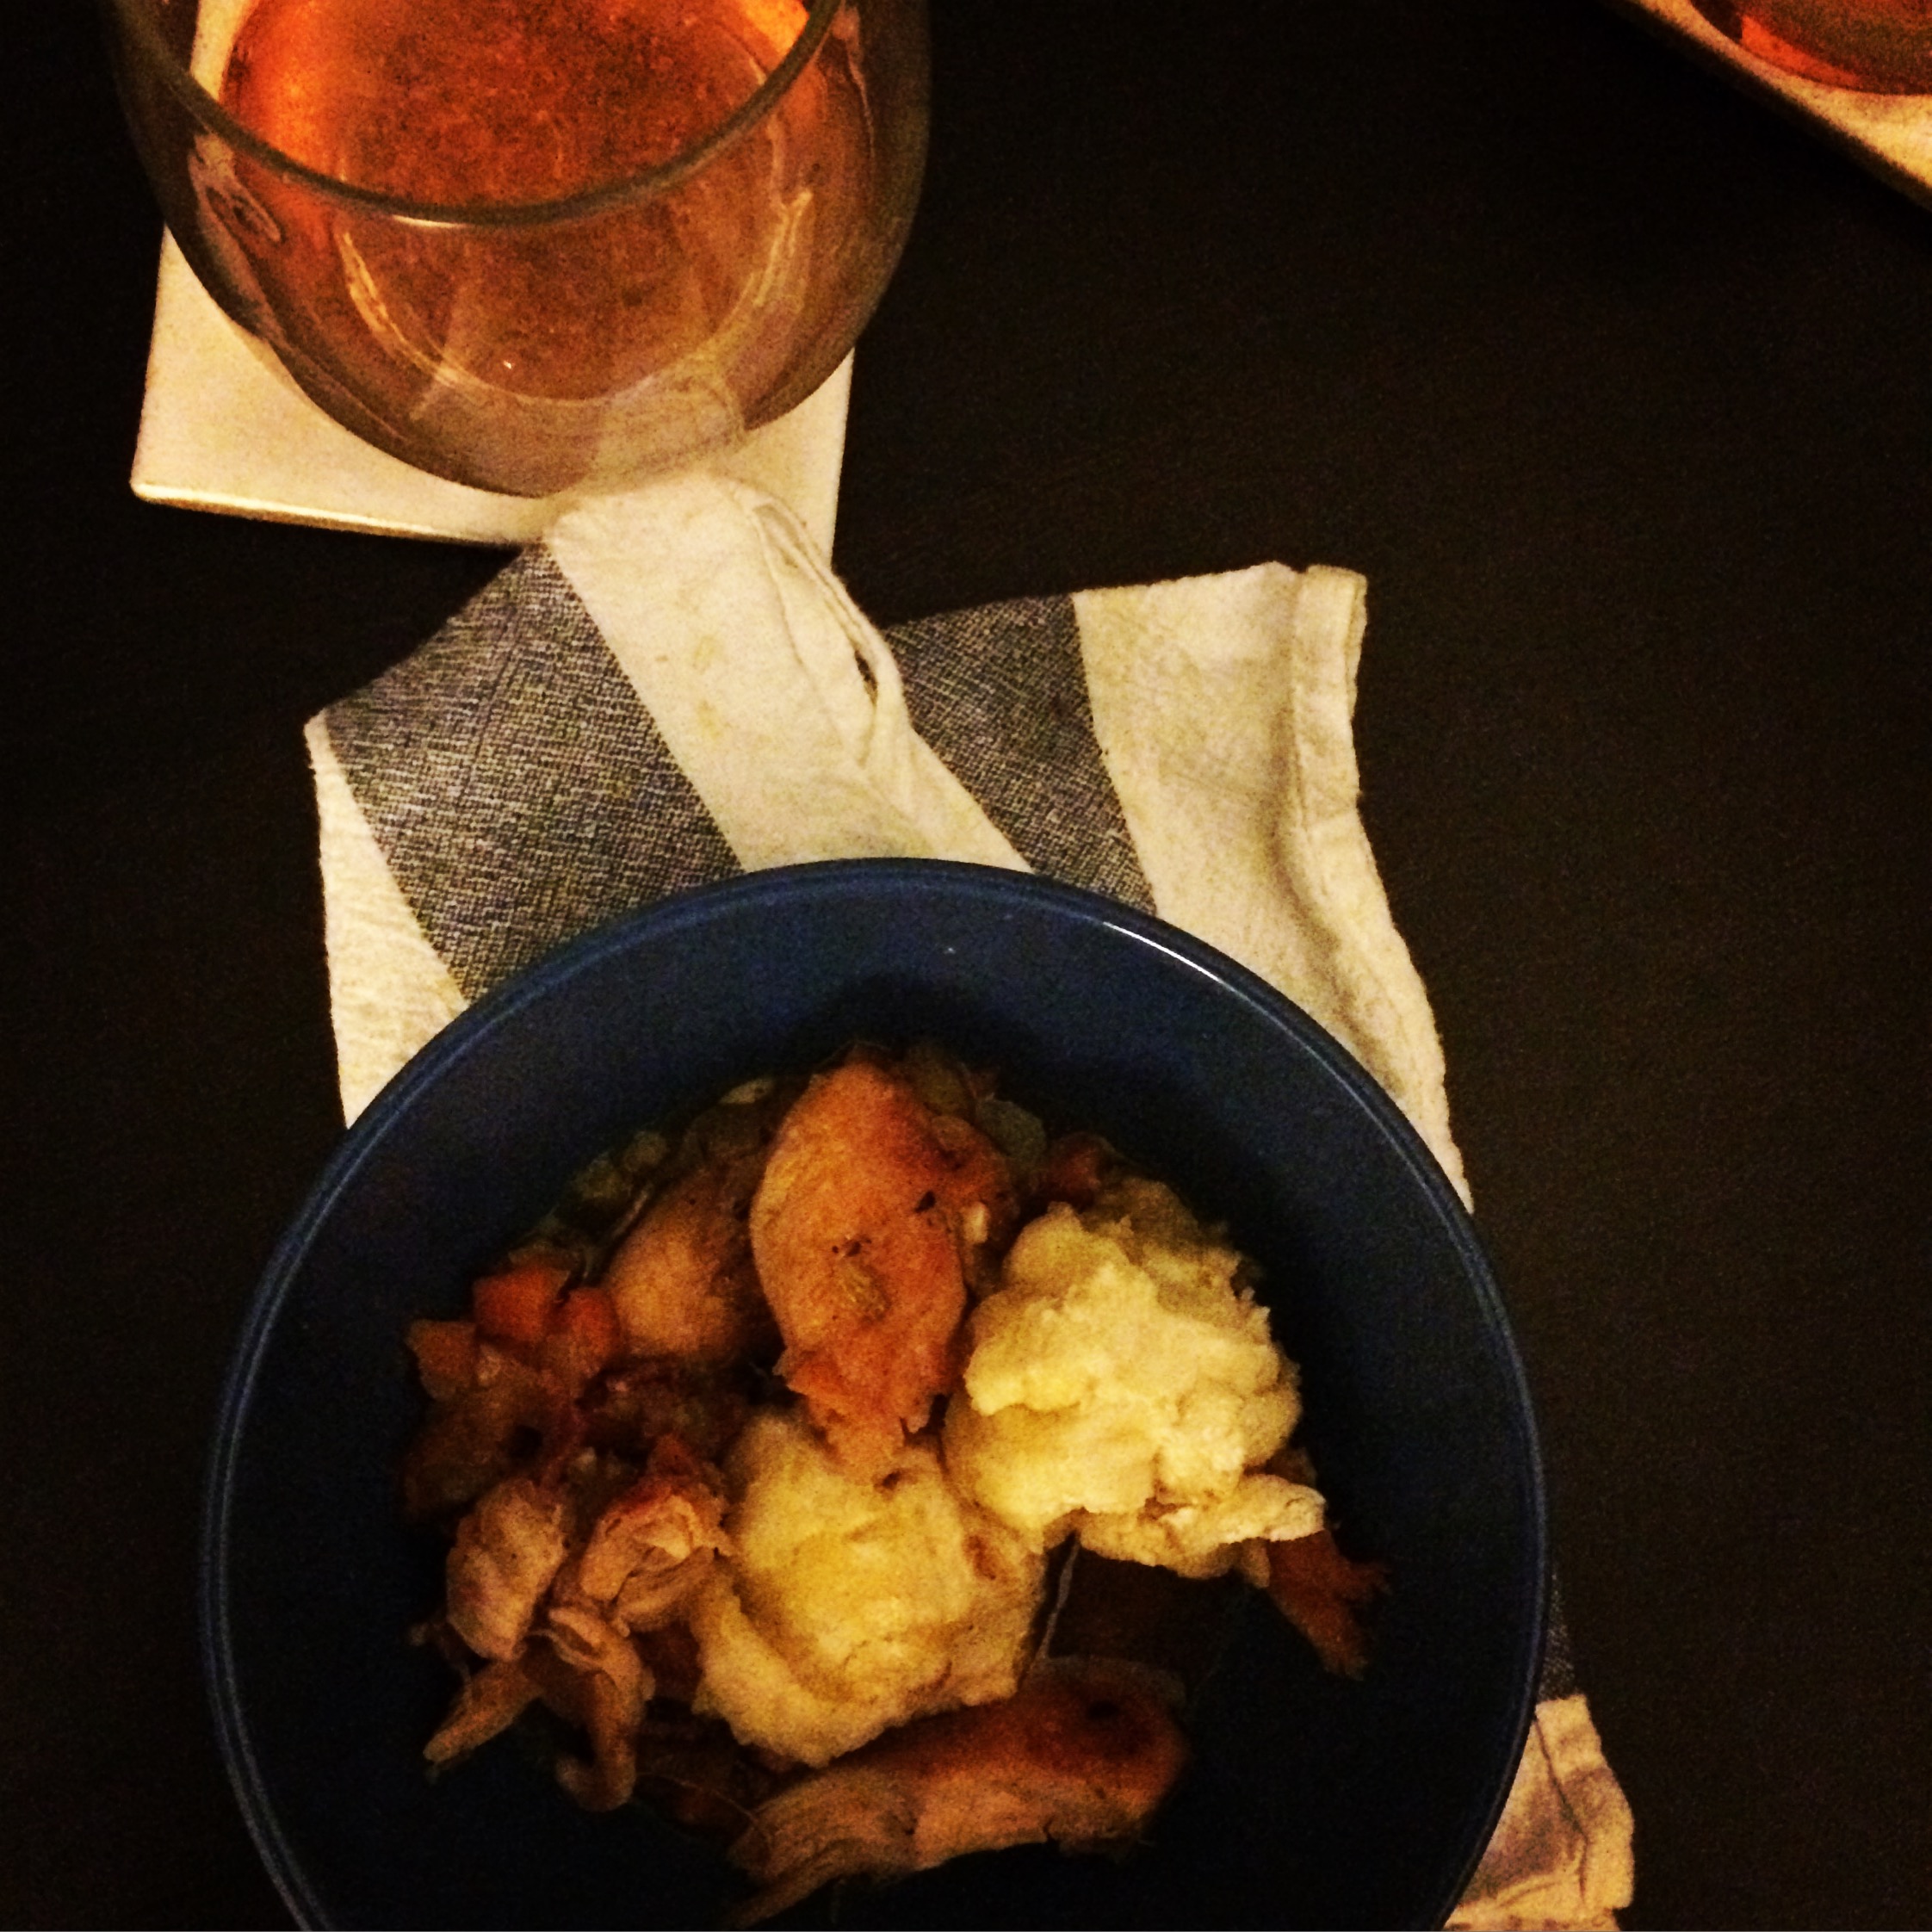
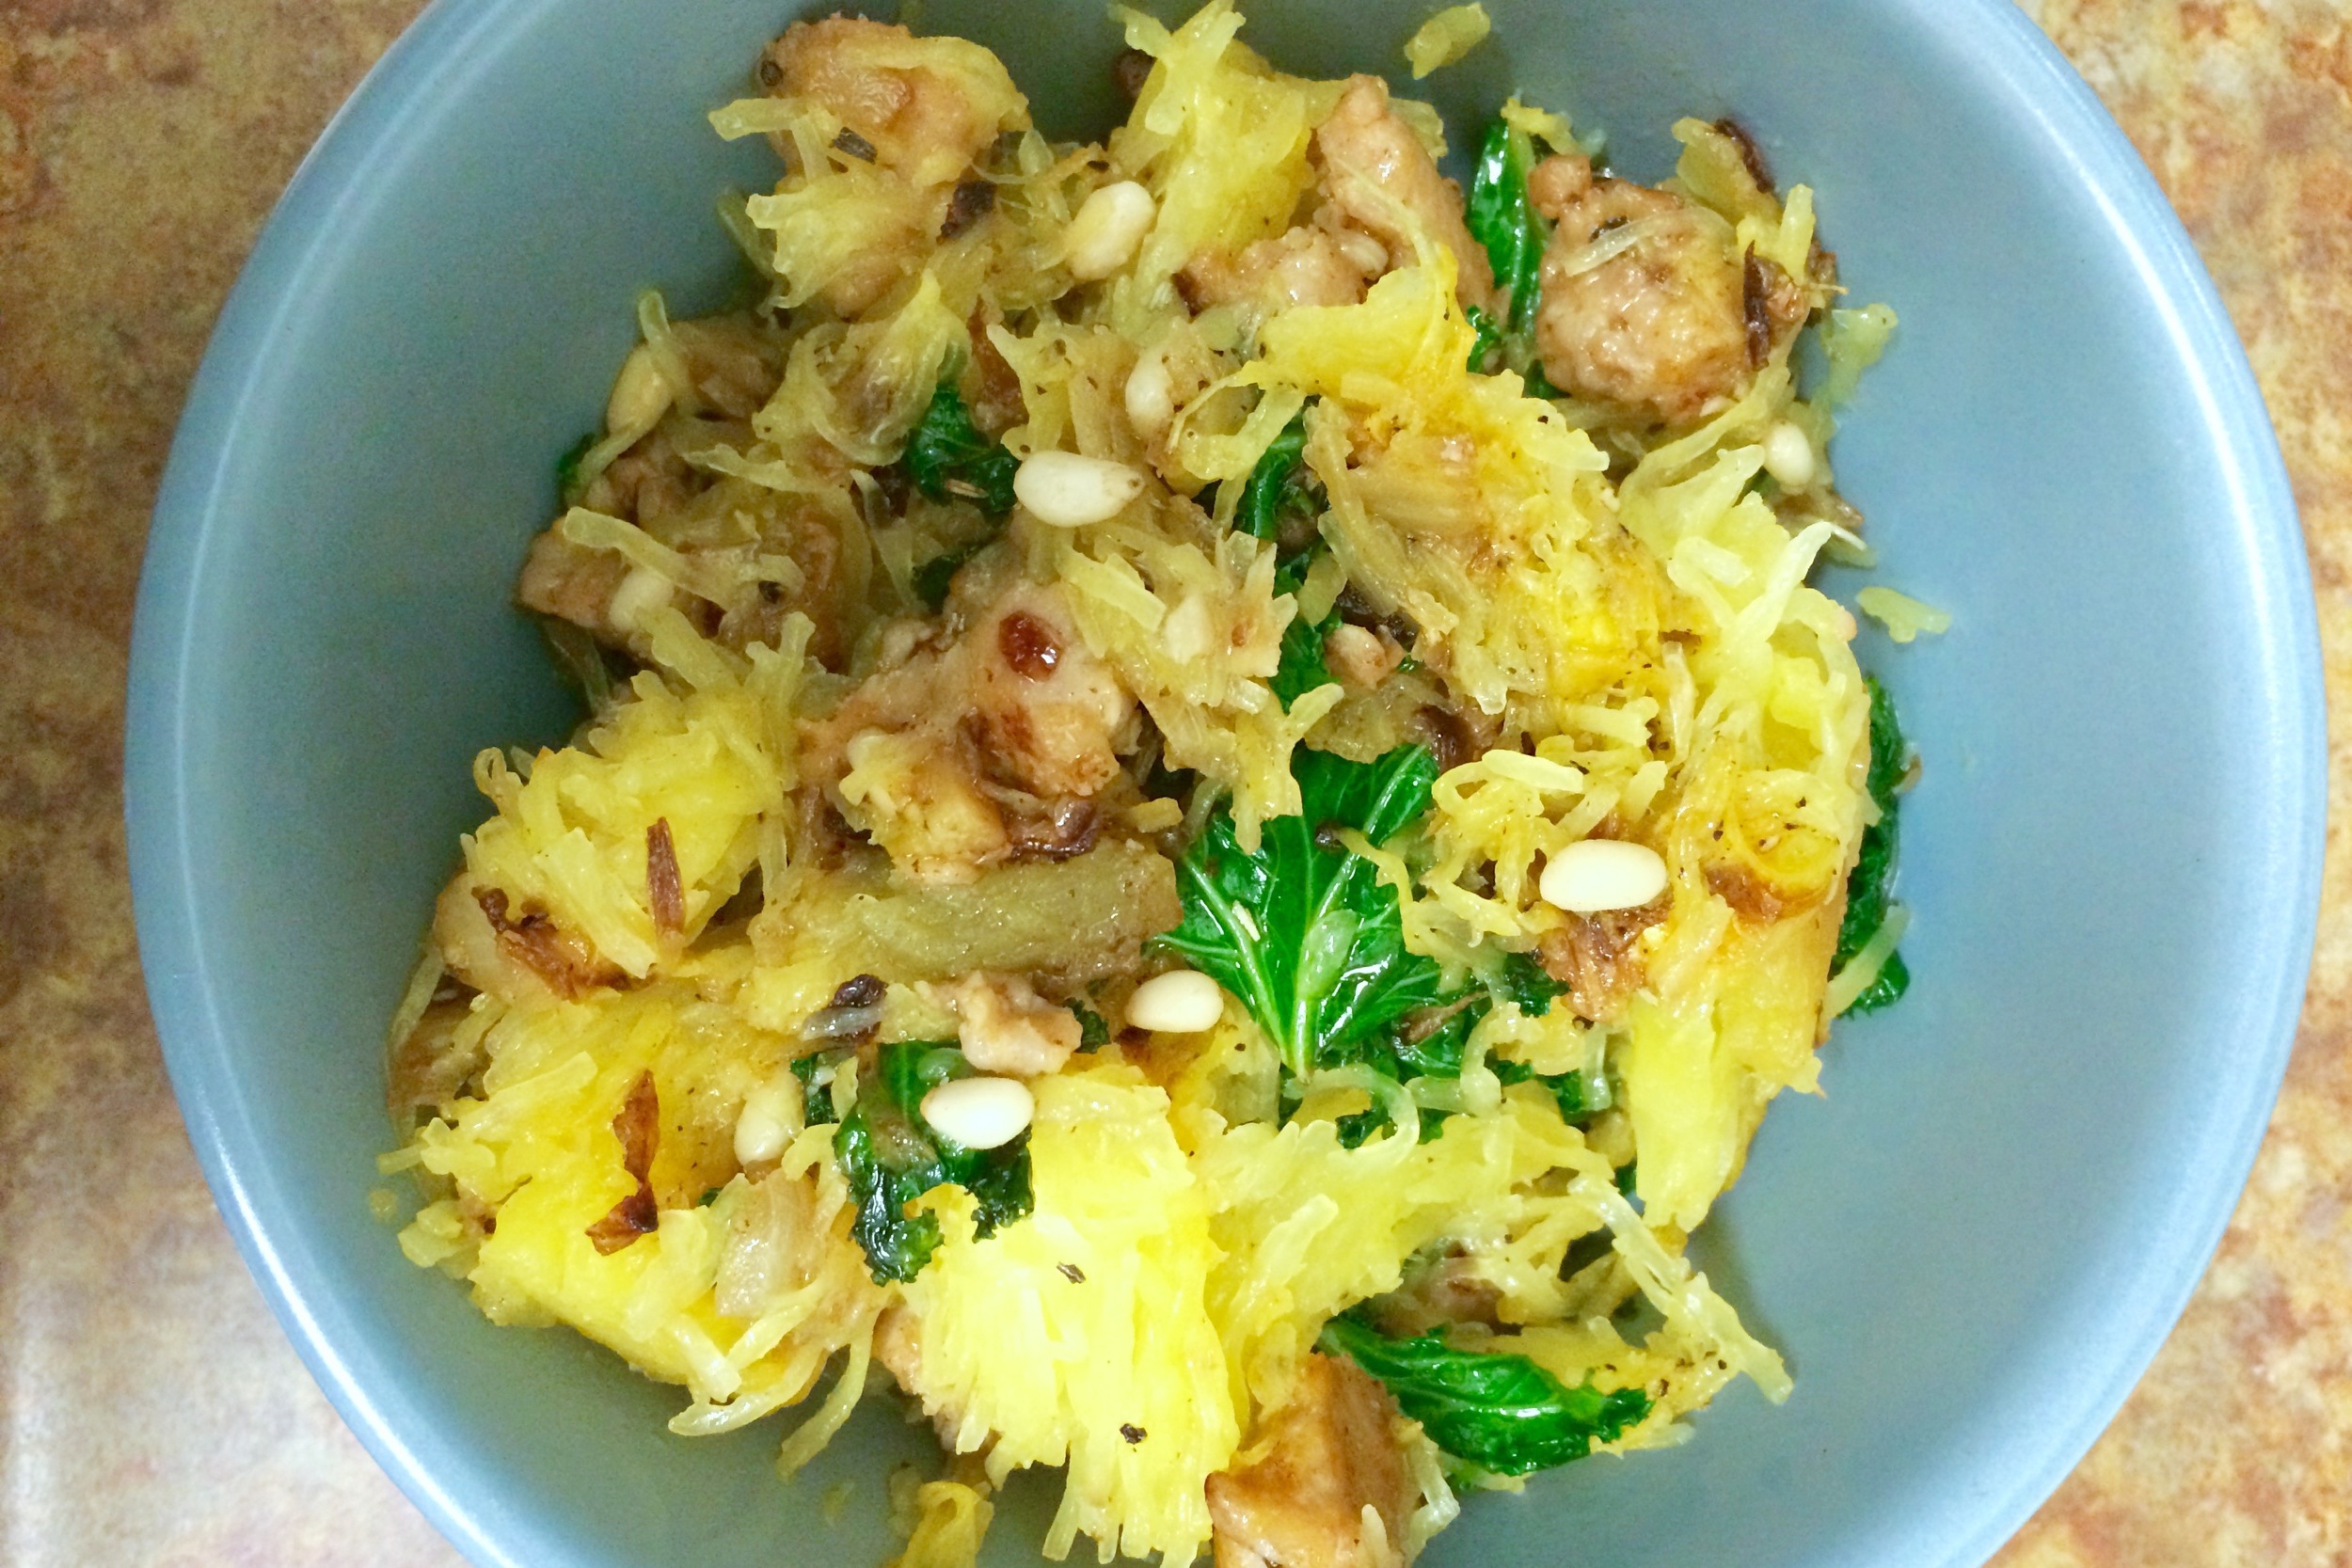
wow guys and girls. it sure has been a while. lots and lots has happened, but I'll spare you the details in this post & get right down to BUSINESS: this risotto.

tomato sausage risotto.JPG

did I mention the east coast is having a terrible cold front at the moment? I woke up this morning and it was TEN degrees. TEN. I left a water bottle in my car to drink the next day (so thoughtful of me, right?) and that bad boy was frozen solid. I could have used it as a weapon.

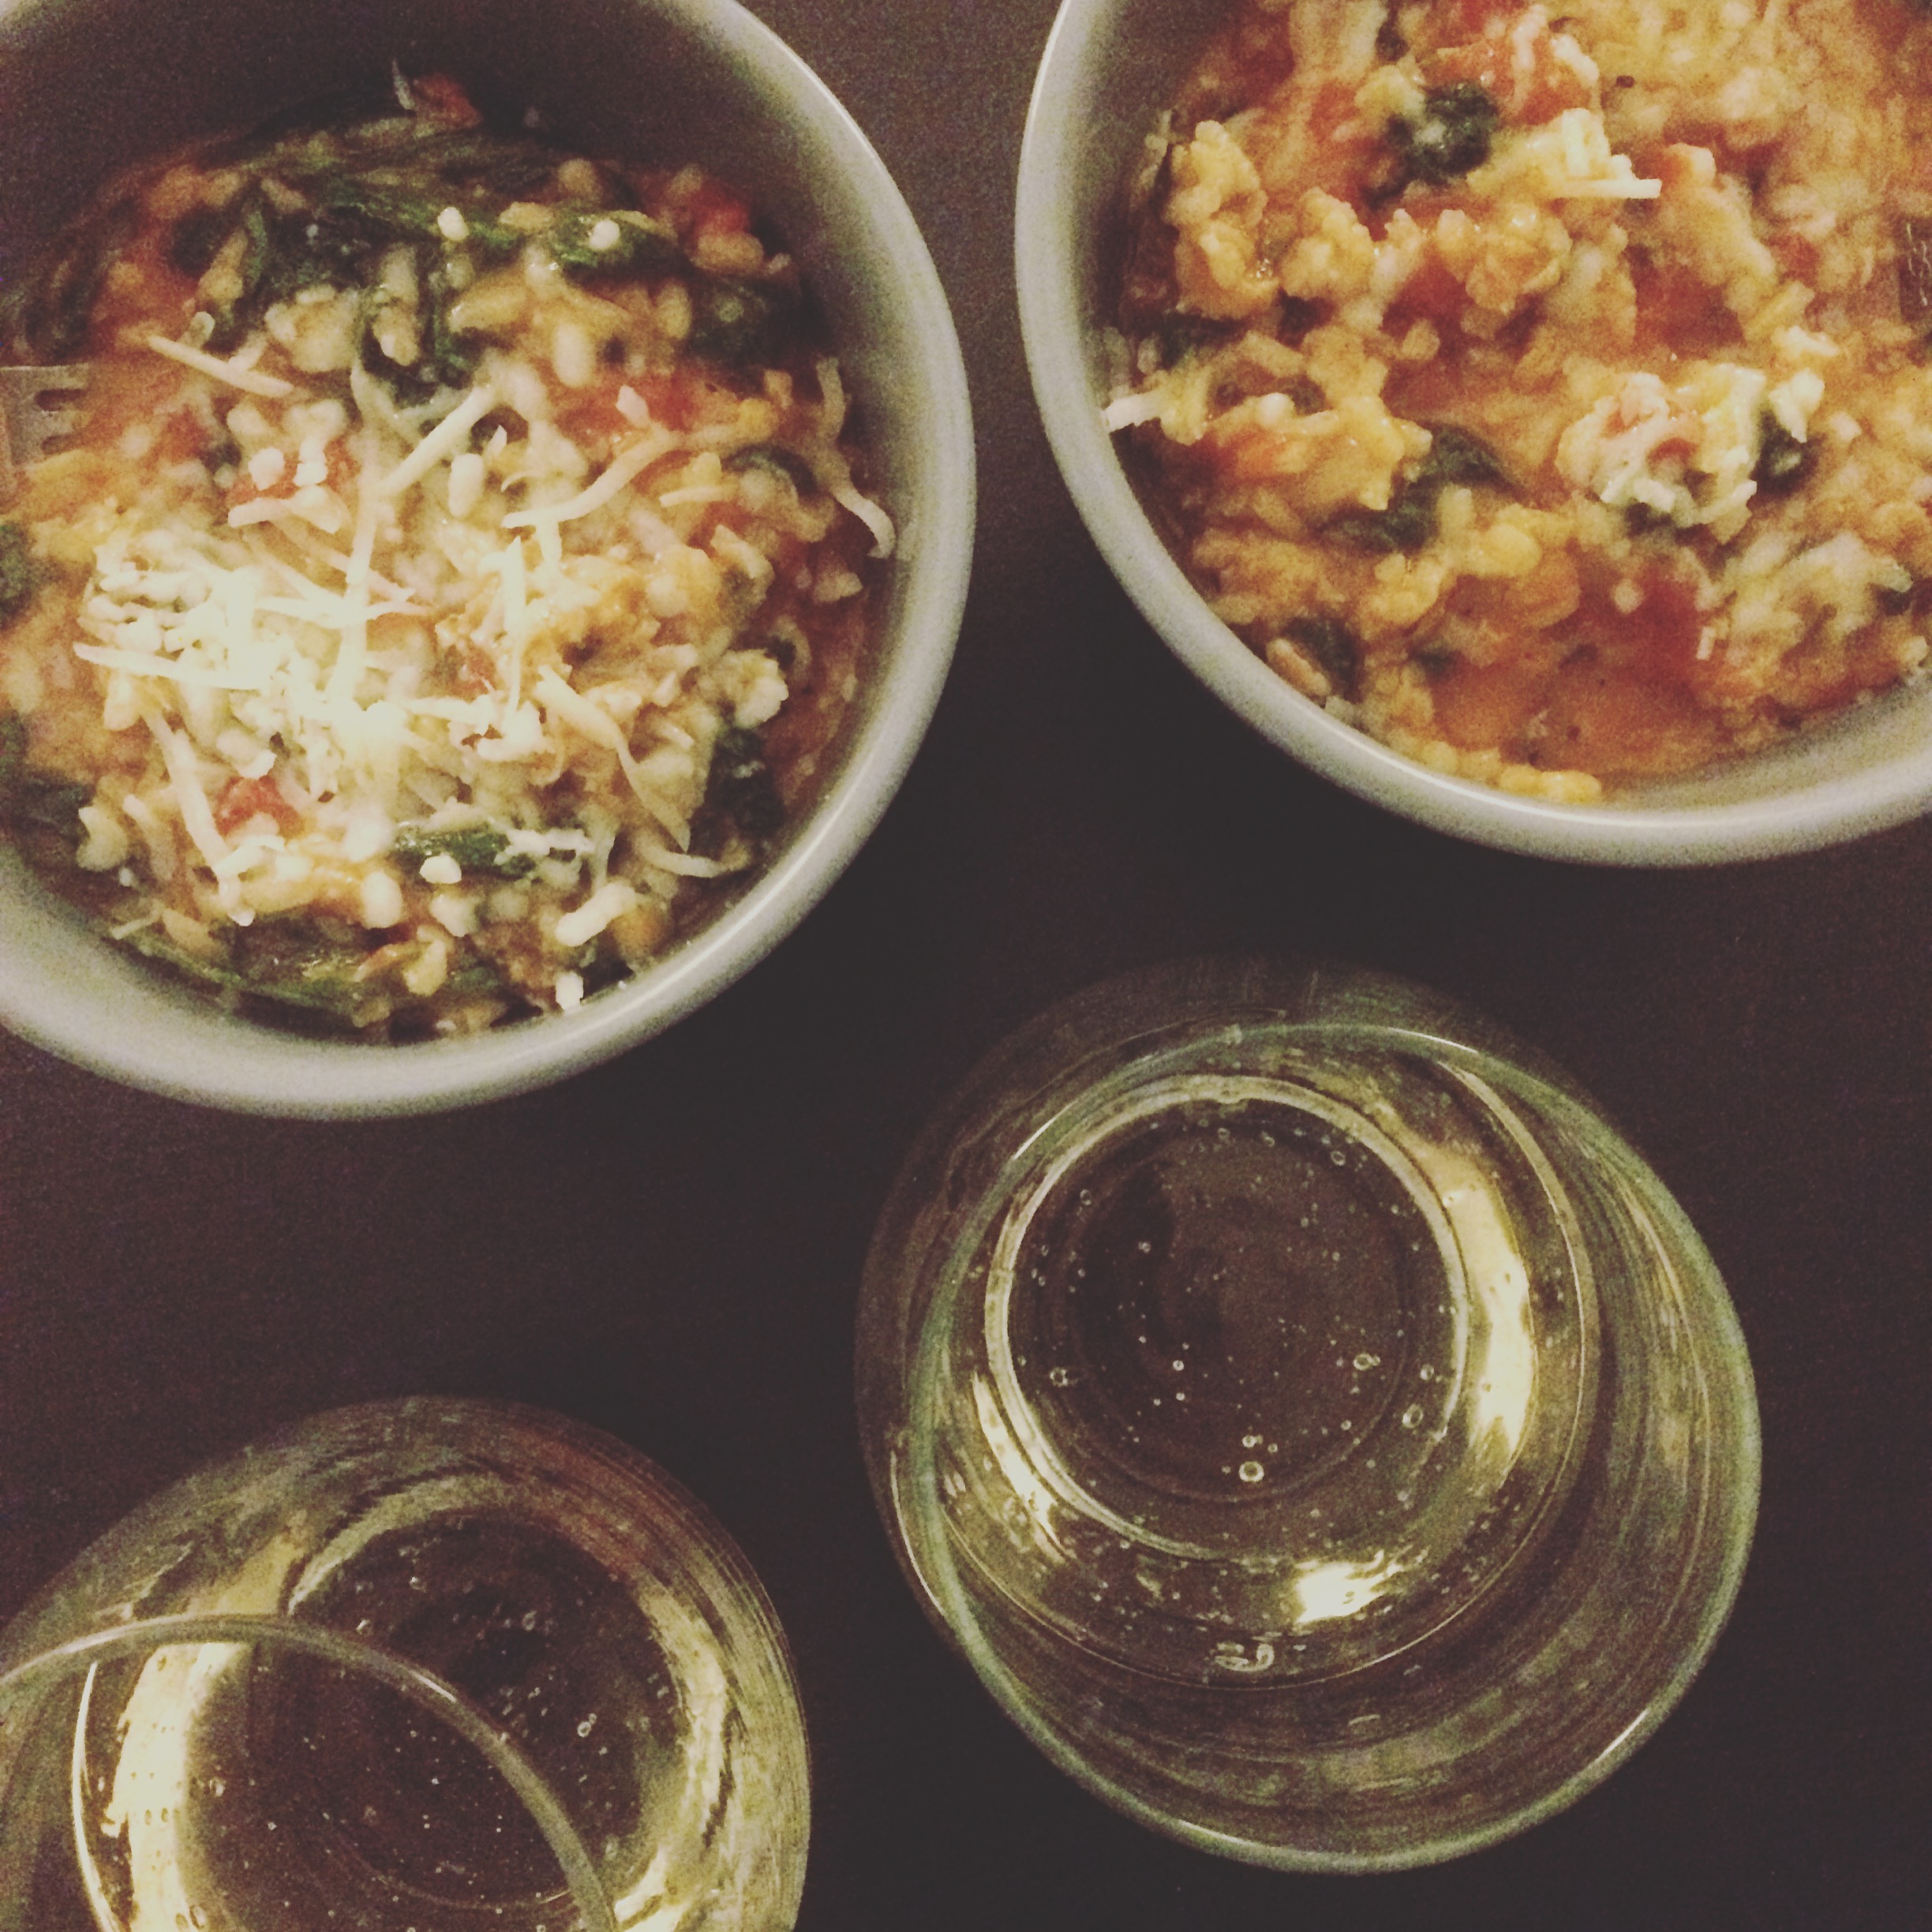
the silver lining is that it does make this the perfect cold weather dish to come home and whip up. oh, and pour yourself a glass of wine - when you're cooking with it, the calories don't count.

I think people are intimidated by risotto, but it's really simple - I promise! just watch your heat levels and stir, baby, stir. it's a labor of love, but it will be SO worth it.

----

tomato + Italian sausage risotto | adapted from smitten kitchen

ingredients | serves four pretty hungry people

  • 1 can (28 ounces) diced tomatoes, undrained
  • 1 tablespoon olive oil
  • 1 pound sweet or hot Italian sausage, casings removed
  • 1 small onion, finely chopped
  • 2 cloves garlic
  • Coarse salt and ground pepper
  • 1 cup Arborio rice
  • 1/2 cup dry white wine
  • 1 bunch flat-leaf spinach (10 to 14 ounces), washed well, tough stems removed, chopped (about 7 cups)
  • 1/2 cup grated Parmesan cheese, plus more for serving (optional)
  • 2 tablespoons butter

instructions

  1. In a small saucepan, combine tomatoes (and juice) and 3 cups water. Bring just to a simmer; keep warm over low heat.
  2. In a medium saucepan, heat oil over medium. Add sausage and onion; season with salt and pepper. Cook, breaking up sausage with a spoon, until sausage is cooked through and onion has softened. Add garlic and saute until fragrant.
  3. Add rice; cook, stirring until well coated, 1 to 2 minutes. Add wine; cook, stirring until absorbed.
  4. Add about 2 cups hot tomato mixture to rice; simmer over medium-low heat, stirring occasionally, until absorbed. Continue adding tomato mixture, 1 cup at a time, waiting for one cup to be absorbed before adding the next, stirring occasionally, until rice is creamy and just tender, about 25 minutes total (you may not have to use all the liquid). 
  5. Remove pan from heat. Stir in spinach, Parmesan, and butter; season with salt and pepper. Serve immediately (risotto will thicken as it cools), and sprinkle with additional parmesan because... I said so.

this isn't in our meal plan for this week but I think I'm going to have to add it in there.... 

bon appétit!

til next time,

#chefhaley

banana bread oatmeal

there’s nothing better on a cold morning than something warm and filling that you can cozy up on the couch with. enter: banana bread oatmeal. (and coffee, naturally.)

i made this for the first time earlier this year when it was freezing cold, and now it's just starting to turn a little colder. yes, for those of you who are baffled - it does get cold in california (at least where i am.). and my darling fiancé loves to keep the apartment  lets just say i’m a layering professional at this point.

you’ll love this oatmeal - we make it at least 2-3x per week since it’s that good.

—-

banana bread oatmeal | source: chef haley’s brain

ingredients | serves one

  • ½ cup rolled oats (also seen as old fashioned oats)
  • 1 cup unsweetened almond milk
  • 1 tsp brown sugar
  • pat of butter
  • pinch of salt
  • pinch of cinnamon
  • handful of almonds (better yet, pecans)
  • chopped banana

*as you can tell, my measurements are pretty exact for this recipe… kidding. it’s very simple, but all based on preference, so start with a little and add more to your liking.

instructions

  1. mix together rolled oats and almond milk in a microwave safe bowl. 
  2. heat for 2 minutes in the microwave. stir, and heat again in the microwave for 30 more seconds. (timing may vary, but i heat in the microwave until it’s thick and there’s no liquid remaining.)
  3. throw in a tsp of brown sugar, pat of butter, pinch of salt, and pinch of cinnamon. stir well - it will get all melty, a little brown, and delicious-looking.
  4. next, throw in your almonds and chopped banana. 
  5. done!

—-

so so easy and yummy, right? next time you wake up and you’re feeling the fall weather, spend your morning making this with a cup of hot coffee and a nice fleece blanket paired with a book (or a blog).

xoxo, #chefhaley

rustic breakfast pizza

i originally made this the first day of 2015. i specifically remember waking up and, for whatever reason, i didn’t really feel like following a recipe. so i winged it, and now we have this delicious breakfast pizza. 

i then nostalgically remembered that on the first day of 2014, i made the spiced apple crumb muffin recipe from gwyneth paltrow’s my father’s daughter, one of the first cookbooks i ever received.

it’s funny to see what can happen in a year or so.

bfast pizza

the great thing about this breakfast pizza is you can easily customize it to whatever you like or have on hand. vegetarian? great, replace the meat with corn and black beans! don’t have sausage at home? totally fine, use some bacon, ham, or chorizo. the beauty of this recipe was that well, it was kind of made up, and it ended up being something pretty awesome.

—-

rustic breakfast pizza | source: #chefhaley’s brain 

ingredients | serves four to five

  • 1 premade pizza dough (i did store bought!)
  • ¼ cup cornmeal
  • 6oz spicy italian sausage
  • 1 bell pepper, diced
  • 1 russet potato, chopped
  • 1 clove garlic, minced
  • 1 tbsp olive oil
  • 3 eggs
  • pico de gallo
  • avocado
  • ½ cup salsa
  • ½ cup shredded cheese
  • salt & pepper 

instructions:

1. preheat your oven to 445 degrees.

2. sit out pizza dough for at least 30 minutes to rise to room temperature.

2. while your dough is out, dice up your 1 bell pepper and mince your 1 clove of garlic. set aside.

3. next, chop up your 1 russet potato. place the potato into cold water immediately. let soak for 5 minutes, then drain and lay out to dry thoroughly.

4. saute your spicy italian sausage in a pan for about 5-8 minutes, until cooked through. once cooked, set aside and leave fat in the pan.

5. now saute your bell pepper, garlic, and russet potato in that leftover sausage fat (sounds awful, but it is such an easy way to add flavor!) you can add 1 tbsp of olive oil if you need more fat in the pan. once browned, after about 10 minutes, set aside.

4. now that your pizza dough is room temperature, split into two sections and hand roll each section in cornmeal. roll or hand knead pizza doughs into even sizes.

5. place both pizza dough halves on a greased baking sheet.

6. top each pizza dough with ¼ cup salsa then with ¼ cup shredded cheese. next up, the sautéed bell peppers, garlic, and potatoes, then the sausage.

7. make little wells in each of the toppings on the pizzas and carefully crack an egg into each well. 

8. bake at 445 degrees for 12-15 minutes.

9. top with pico de gallo, avocado, and extra cheese and salsa. 

10. slice and serve! serves about 4-5. 

—-

hope you enjoy it! 

xoxo, #chefhaley

perfect single serving chocolate chip cookies

you know those nights where you’re craving something sweet, but you don’t know exactly what, so you tear apart your kitchen, eating along the way? yes, i’m guilty of this too. every once in a while, you just need a little something sweet. enter: single serving chocolate chip cookies. 

these are so easy to whip up it’s dangerous.

cookies

for two people, this is the perfect evening dessert with a side of netflix and a glass of milk… or wine. no judgement here.

—-

erfect single serving chocolate chip cookies

ingredients | makes four medium sized cookies (two servings)

  • 2 tablespoons of melted butter
  • 2 tablespoons of brown sugar
  • 1 tablespoon of white sugar
  • ¼ tsp vanilla extract
  • pinch of salt
  • 1 egg yolk (save or discard the white)
  • ¼ cup all purpose flour
  • ¼ tsp baking soda
  • 2 tablespoons (or more or less) chocolate chips

instructions

  1. preheat your oven to 350 degrees. line a baking sheet with parchment paper for limited clean up. (i’m telling you - i was never a believer in this ‘parchment paper’ stuff, but it is a game changer.)
  2. melt your butter in the microwave for about 30 seconds, until partially melted but not steaming. let the melted butter sit while you do the next step.
  3. mix together your brown sugar, white sugar, vanilla extract, and pinch of salt. 
  4. mix in your cooled melted butter.
  5. mix in your egg yolk.
  6. now you can mix in your dry ingredients. mix in the flour and baking soda into your wet mixture.
  7. finally, pour in your chocolate chips to your heart’s content. (who’s counting tablespoons anyway?)
  8. place on lined baking sheet in heaping tablespoon scoops. this should yield you 4 cookies.
  9. bake for 6-8 minutes, until golden brown around the edges.
  10. enjoy!

—-

i hope this brings a little bit of sanity to your life when you just need a little bit of something indulgent.

til next time,

xoxo, #chefhaley

homemade granola

as y'all know, i love me some breakfast. i love it in every way, shape, or form. but granola can be so sneaky! most store bought granolas have very little fiber and way too much sugar, but it tricks you into think it's a health food. so, i decided to make my own with things i had in my pantry and a little guidance from skinnytaste.

granola

this granola recipe is adapted from skinnytaste’s new cookbook - a staple in my kitchen - and i simply changed it to fit our tastes and what we had on hand. edited down, it only has 2.5 g of sugar per serving!.

—-

homemade granola | source: adapted from skinnytaste’s cookbook

ingredients | serves 11 (serving size is 1/3 cup)

  • ¼ cup quinoa
  • 1 ½ cup rolled oats
  • ¼ cup unsweetened shredded cocounut
  • ¼ cup flaxseeds
  • ¼ cup almonds
  • ¼ cup pecans
  • ¼ cup dried bing cherries
  • 1/8 cup real maple syrup
  • 1 teaspoon coconut oil
  • ½ teaspoon vanilla extract
  • ¼ teaspoon cinnamon
  • kosher salt

instructions

  1. preheat your over to 325 F. line a rimmed baking sheet with parchment paper.
  2. rinse your quinoa thoroughly under cold water in a fine mesh strainer. drain well and pat dry. (this may seem superfluous, but rinsing your quinoa is essential!)
  3. spread your quinoa, oats, and shredded coconut out on your lined rimmed baking sheet. toast in the oven, stirring once, until golden. mine took about 15 minutes. your kitchen will smell divine!
  4. while toasting, mix together your flaxseeds, almonds, pecans, and dried fruit in a bowl. 
  5. transfer your oat mixture to that same bowl and give it a good mix. leave your oven on in the meantime.
  6. in a small bowl, combine the maple syrup, coconut oil, vanilla, cinnamon, and a pinch of salt. pour this mixture over the oat mixture and stir to combine.
  7. spread your final mixture out on the same lined baking sheet as before. bake until golden brown, about 10 to 15 minutes.

—-

i love this granola and can eat it by itself it’s so good. that baked taste element takes it to a whole new level. i’ll serve it up with ½ cup plain greek yogurt for some added protein. kept in an airtight jar, it can last up to a month or longer!

try this version and let me know what you think!

xoxo, #chefhaley

beauty favorites: travel skincare

For those of you that know me well, you're probably surprised this post hasn't already happened. 

For those of you that don't know me well... my name is Haley and I have a beauty product addiction. Welcome to my obsession.

Since I traveled 2/3 of the way around the WORLD this summer, I figured I'd put together a little post on what saved my skin from wreaking havoc on itself these past few months.

Just three quick notes here...

  • I am a devoted reader of the UK skincare guru Caroline Hirons. Her cheatsheets on her blog literally changed my skin, and therefore my life. Specifically, the routines one. If you have even an inkling of interest in skincare, go read up - it's been a huge year of education for me and why I use the products i do and in which order.
  • I tend to gravitate towards more expensive skincare products simply because the ingredients are better and the quality is better, especially for serums. I also always try to look for natural skincare without parabens - something that's hard to find in the drugstore. However, one of my favorite cleansers of all time is Cetaphil. So, there's give and take.
  • My skin is normal to dry, somewhat sensitive, and dehydrated (as most of our skin is.) Your skin might be totally different, so keep that in mind for product recommendations!

Okay, ready?!

travel skincare

we'll start from left to right, shall we?

fresh sugar lip treatment ($22.50) - the holy grail of lip balms. i always have this on my nightstand and in my bag on long flights. i religiously use burt's bees as a daily lip balm and have one strategically placed everywhere. but this is the big kahuna for me when it comes to lip care. and it has spf!

caudalie beauty elixir ($18.00, travel size) - my skin is on the drier, dehydrated side, so i'm always looking for bursts of moisture in my skincare products. enter: this caudalie spray. it's considered one of the best hydrating toners, and i didn't realize how much my skin loved it until i stopped using it. it's perfect for flights since the air is SO dry, just a quick spritz of this on your hands to press lightly onto your face and voila, instant moisture. i use this after cleansing, but before serum.

glamglow thirstymud hydrating treatment ($19.00, travel size) - i have always been fascinated with any and all of the glamglow masks, but was so put off by their price tags. thankfully, these mini sizes were introduced, and i tried the hydrating one right before our charleston trip... and i LOVED it. it's thick, creamy, and smells like coconuts. mmmm. i have used it on 4 trips now, and have barely made a dent in the small size. i use a dime size (or less) on top of my moisturizer, or in place of it on the plane. 

caudalie vinosource sos thirst quenching serum ($49.00) - for the price, this is (in my honest opinion) the best hydrating serum out there to my knowledge. i haven't found another serum that does anything close to what this serum does for my skin. it's my security blanket - i bring it everywhere with me. it's silky, absorbs quickly, and makes a huge difference in my skin's hydration. if i had to tell you to choose one product on here to start using today - it would be this one. apply this after your toner, before your moisturizer.

kate somerville exfolikate intensive exfoliating treatment ($22.00, travel size) - yet another product i have been dying to try due to its amazing reputation in the beauty community, but the price tag for the full size was too high. these little travel sizes are perfect for me - i don't need to use it more than once a week to see a difference. it's that strong of a product. exfoliating when traveling is key - since your skin is so dry, you need to get that dead skin off of there to help your other products penetrate.

tata harper replenishing nutrient complex ($45.00) - i LOVE this little guy. it's basically an all natural multivitamin oil for your face. the nutrients in this really take your skincare game up to the next level - my skin just soaks it in. apply after your moisturizer for a top coat of herbal, oily deliciousness. *no, applying oils to your skin doesn't make your skin extra oily. if anything, this will help restore your balance of moisture and make your skin less oily!*

whew, that was fun! and i hope it was helpful!

i could talk about skincare all day long, you guys. but i won't bore you any further. those of you who are interested - leave me some comments and we'll chat.

til next time,

#chefhaley


tokyo recap!

wow you guys... long time no talk. it's been almost a month since i've posted and i'm so, so sorry!

but can you just check out this ramen real quick, and forgive me?

tokyoramen

mmhmm, that's what i thought.

tokyo was so, so interesting. i was only there for 6 days (including traveling) and was working 7am-7pm, so didn't have too much time to explore the city like you should when you're in such an amazing place.

what i didn't get to do in sightseeing, i did make up for in eating ALL of the food. i'm very lucky to have such great coworkers that made sure i ate the things i was interested in, as well as some traditional japanese dishes.  i ate things i couldn't pronounce - this ramen, for one (tsukeman style, no idea what's in it) - and wouldn't have eaten under normal circumstances - beef gizzard, fish sausage (who knew?), so many raw types of sea creatures - and tried a lot of things that i didn't even know what they were. but my palate and my mind were so intrigued. i still am trying to remember and figure out what i ate.

the culture is so different from here - not at all in bad ways. everything in japan is about the group as a whole - not the individual. everything is clean, fast, convenient, efficient, and everyone is polite. exceedingly so. it made me feel very aware of american culture and norms, and how brash and rude we must seem, especially in this type of setting. drawing attention to yourself is a big no no. even on trains and train platforms, it's considered rude to talk on the phone or even have your sound on.

being blonde, i did get some attention from children - one told me i looked like Elsa from Frozen (i had my hair in its notorious side braid) - and i did get asked to have one photo taken with a group of teenagers. it was very different for me to be in a community where i was very clearly not from there. but it was refreshing in a way.

the day i got home, i researched prices on going back and also stopping in a few more asian cities. i almost feel like the city and culture gets more complex the longer you stay - but you want to stay to dig in deeper.

i'm counting the days until i can go back and give tokyo a proper run, but until then i'll be daydreaming about this ramen.

til next time,

#chefhaley


ireland recap!

we're baaaack! i never truly understood what jet lag was until i spent 18 hours traveling home with an 8 hour time difference. i was also there for 14 days, so it's been quite the adjustment. it's like being hungover yet drunk and the same time. woof.

despite the jet lag , the experience was unforgettable. i spent the first week in dublin working (my company has an office there) and then TS came out to meet me and travel!

first of all, irish people are seriously the BEST - so welcoming and friendly. they're like the southerners of the UK - our cab drivers chatted the entire trip, and we never met a stranger at the pub. it made the experience that much better to know we were so welcomed. i think traveling with a red head didn't hurt, either ;)

my first week was spent mostly working, but i frequented many restaurants, pubs, shopping, and of course, the infamous temple bar neighborhood. the live music, crowded streets, and international crowd singing (mostly) american music was definitely a fun night. i was hurting the next day, but it was well worth it!

the second week i spent with TS, we checked some of the "touristy" spots in dublin off our list - guinness storehouse, dublin castle, trinity college library, the national gallery, saint patrick's cathedral, grafton street, jameson distillery, numerous pubs and bars. but we also just walked around, grabbed late afternoon coffees, took naps, and always ended the night with a pint at a pub. it was the kind of lifestyle i could definitely get used to.

we also took the irish rail to a small town on the west coast of ireland called Galway - it was basically a mini Dublin, but way closer to a lot of the scenic ireland coastline. we took a tour of the country, the burren landscape, and the infamous cliffs of moher. it was stunningly beautiful and hard to even really absorb in the moment. 

now, we're just getting back in the swing of things at home. it's been nice to relax and readjust. 

but then wait! i just found out i'm off to tokyo next week for work! i'll do my best to get some recipes up before then, but when i'm back it's all health food from now on to get ready for this kind of big thing called a wedding we have coming up :)

till then,

xoxo, #chefhaley

easy chicken + dumplings

it's about time i put a southern recipe on here, am i right?

chicken and dumplings

chicken and dumplings is the homiest, coziest recipe that i probably can whip up from memory. it's a simple one-pot dish that you can prep in the early afternoon and have an amazing, flavorful dinner by nightfall. 

i took an already pretty easy recipe and simplified it even more by using a rotisserie chicken. you don't get the crispy skin - but the flavor in the broth and the dumplings are so good, you'll hardly miss it.


easy chicken + dumplings

adapted from gwenyth paltrow's recipe in my father's daughter

ingredients | serves 4

  • 1 whole rotisserie chicken
  • coarse salt
  • freshly cracked black pepper
  • 1 tbsp unsalted butter
  • 1 tbsp olive oil
  • 1 stalk celery, chopped
  • 1 large carrot, peeled and chopped
  • 1 small leek, chopped
  • 1 slice bacon, finely diced
  • 1 dried bay leaf
  • 1 tsp fresh thyme
  • 1/2 cup white wine
  • 2 cups vegetable or chicken stock
  • 2 cups water
  • 1 cup all-purpose flour
  • 1 tbsp baking powder
  • 1/2 cup plus 1 tsp half-and-half
  • 1/2 tsp fine salt

instructions

  1. preheat your oven to 400 degrees f.
  2. deconstruct your rotisserie chicken, collecting the meat and discarding the bones. place in a bowl and season with salt and pepper.
  3. heat 1 tbsp olive oil and 1 tbsp butter in a dutch oven over medium-high heat. add your vegetables, bacon, bay leaf, and thyme to the pot and season with salt and pepper. sauté for 2 minutes until fragrant. lower temp and cook for 15 minutes over medium-low heat.
  4. add the chicken to the pot and stir to combine.
  5. add white wine and bring to a boil for 2 minutes.
  6. add stock and water, bring to a boil and season with salt and pepper.
  7. turn off the heat, and place the lid on top of your dutch oven.
  8. place in the oven and cook for 1.5 hours.
  9. before the timer beeps, combine the flour, baking powder, half-and-half, and salt together in a bowl.  
  10. take the pot out of the oven and place heaping spoonfulls of batter on top of the chicken mixture.
  11. cover the pot and place it back in the oven for 10 more minutes.
  12. uncover and serve immediately (with brut rosé as shown above)

next time you're feeling up for a cozy day at home, you'll have the perfect recipe to accompany your netflix marathon.

hope you love it!

xoxo, #chefhaley

chicken sausage, kale + potato frittata

mmmm this frittata is the best best best. i've recently become more of a savory breakfast person - i used to be an all sweet breakfast no exceptions kind of person - and this frittata has helped that transition immensely. it's super healthy, and light but filling and great heated up. we'll make it on sundays and eat it throughout the week til it's gone!

frittata

served with a side of fruit and a latte - it's the perfect way to start your day.


chicken sausage, kale + potato frittata

adapted from skinnytaste

ingredients | serves 8 

  • 3 large eggs
  • 3 large egg whites
  • 2 tbsp parmesan cheese
  • kosher salt
  • freshly cracked black pepper
  • 2 tsp olive oil
  • 6 oz sweet italian chicken sausage, casings removed
  • 1 small yellow onion, chopped
  • 12 oz (2 medium) yukon gold potatoes, diced
  • 1/4 tsp garlic powder
  • 1/8 tsp paprika
  • 1 cup chopped kale, stems and ribs removed

instructions

  1. Preheat your oven to 400 degrees F.
  2. Crack your eggs into a large bowl. Add egg whites, parmesan, a pinch of salt and pepper, and whisk until well blended.
  3. Heat a tsp of olive oil 10-inch nonstick oven-safe skillet over medium heat. I use my cast iron for this and it works wonderfully. 
  4. Add your sausage and onion, breaking up the meat with a wooden spoon and cooking through until the onions are golden. Transfer to a plate.
  5. Add the remaining tsp of olive oil to heat in your pan, then add your diced potatoes. Season with salt, pepper, garlic powder, and paprika. stir them frequently and cook until tender.
  6. Add the kale, mixing it in and letting it wilt.
  7. Combine your sausage and onion mixture with the kale and potatoes in the skillet, spreading it evenly within the pan. 
  8. Pour the egg mixture over the skillet. Reduce the heat to low and set your timer to 8 minutes.
  9. Once the 8 minutes is up, transfer the skillet to the oven and cook for another 10 minutes until the frittata is completely set.
  10. Cut into 8 pieces and serve!

I adore this recipe, and hope you do too. Pro tip - it's perfect to make on a week where you buy the ingredients to make my spaghetti squash recipe :) let me know what you think!

xoxo, #chefhaley

easy skinny cheesecake

this cheesecake is by far the most requested item in my house. as in, by my fiancé. but that's okay. i'll gladly oblige, because this cheesecake is a rarity: easy and skinny! say what?!

easyskinnycheesecake

this is my homage to fourth of july - but you can do whatever you'd like! drizzle chocolate or caramel, add whipped cream, more fruit, or all of the above. or even plain for pete's sake. all i'm saying is you need to try this asap!


easy skinny cheesecake

adapted from skinnytaste

ingredients | serves 8

  • cooking spray
  • 1/2 cup crushed graham cracker crumbs
  • 1 tbsp butter, softened
  • 8oz package of reduced fat cream cheese, softened
  • 1/4 cup sugar
  • 6oz fat free vanilla greek yogurt (I use Chobani)
  • 2 large egg whites
  • 2 tbsp lemon juice
  • 1/2 tsp vanilla extract
  • 1 tbsp all purpose flour
  • toppings of your choice!

instructions

  1. Preheat the oven to 350 degrees f.
  2. Spray a 9-inch round pan with cooking spray.
  3. Prepare your crust by pulsing the graham crackers and butter in a food processor until fine. Or, buy a premade one from the store and use it. I've done both!
  4. Beat cream cheese, sugar, and vanilla until smooth using an electric or stand mixer. 
  5. Slowly add in yogurt, egg whites, lemon juice, and flour. Do not over beat! Just until it's smooth, otherwise it will separate.
  6. Pour the mixture over the crust.
  7. Bake for 30 minutes.
  8. Cool to room temperature, then top with berries. Chill for a few hours before serving!

I've made this for friends, work functions, family, and obviously myself over a dozen times over the years, and It's definitely one that i'll use for years to come! the lemon and vanilla are easy ways to add flavor without calories, and the greek yogurt helps keep the richness. it's so delicious, i'm craving it now as i type.

what dessert did you celebrate 4th of july with?

xoxo, #chefhaley


updates!

sorry i have been MIA, my friends! it's been a crazy couple months here at the #chefhaley household... so here are some updates for you!

yes, that's what that photo is - we got engaged! on my birthday, march 22nd, my best friend gave me the best present i've ever received after (you guessed it) making the best blueberry pancakes i've ever had in my life. i've been calling them engagement pancakes - they'll be on the blog at some point :) we're so excited to start this journey together, and i'm so so thankful for his love.

ever since then, we've been traveling - home to virginia, new places like seattle - and just got back from a wonderful family vacation in charleston, sc. our families threw us a surprise engagement dinner - aren't those foxes just the cutest?! - we spent plenty of time by the sea and pool, and I also found THE dress!! i was adamant about just going to "look" but low and behold, i found the one.

i promise you'll have more recipes coming your way soon! we're off to ireland later this month so i'll post a quick update then, but have some recipes scheduled throughout our trip. 

any wedding planning advice, please send them my way :) 

xoxo, #chefhaley


basil chicken curry

this recipe was my first foray into the intimidating world of curry. i've eaten it a lot - san francisco has some of the best hole-in-the-wall curry spots ever, one of them blissfully behind one of my work buildings - but i had never been brave enough to attempt it myself.

basilcurry

enter: this recipe from half baked harvest. if you haven't checked out her blog - please do yourself a favor and do so. she is an amazing home cook and not to mention, started cooking at the ripe age of 15 for her entire family. she's one of my all time favorite food blogs and this recipe absolutely inspired me to challenge myself more in the kitchen.

okay, onto the recipe. i adapted it to my tastes - for example, i am NOT a fan of ginger for whatever reason, so i omitted it anywhere and everywhere from the original recipe. I also did not include the mango salsa, just because I was lazy and didn't have those ingredients on hand, but i'm sure it's divine if you'd like to try it!


basil chicken curry 

ingredients | serves 4

basil coconut lime rice

  • 1 (14oz) can light coconut milk
  • 1 cup jasmine or basmati rice
  • 2 tbsp fresh basil, chopped
  • 1 lime, juiced

chicken curry

  • 1 lb boneless, skinless chicken breast, diced
  • 2 bell peppers, chopped
  • 1 zucchini, chopped
  • 1 cup corn
  • 2 cloves garlic, minced
  • 2 tbsp olive oil
  • 2 tbsp red curry paste
  • 1 tbsp curry powder
  • 1 (14oz) can light coconut milk
  • 1/2 tbsp fish sauce
  • 1/2 cup fresh basil, chopped
  • fresh naan, for serving

instructions

  1. add coconut milk to a saucepan and bring to a low boil. add rice and salt and turn the heat all the way to low. place the lid on and keep it on for a solid 20 minutes. after 20 minutes, stir and continue to cook if needed. after the rice is fully cooked, stir in the lime juice and chopped basil and keep warm.
  2. add olive oil to a large skillet and heat over medium heat. sauté diced chicken with salt and pepper for about 5-10 minutes until cooked through.
  3. add more olive oil to the pan and incorporate all of the veggies for another 5 minutes, until soft and browned.
  4. add curry powder and curry paste to the pan and stir to incorporate, about 1 minute.
  5. add coconut milk and fish sauce to the pan and bring to a light simmer. stir until the sauce thickens slightly or to your liking.
  6. turn off the heat and add freshly chopped basil.
  7. serve on top of coconut lime basil rice with a side of fresh, warm naan.

if reading through that ingredient list and instructions didn't make you hungry, i'm not sure what would! for beginners, this is a perfect recipe for a simple, super flavorful, and satisfying curry that makes you feel like you just got takeout. 

hope you love it!

xoxo, #chefhaley

sausage + kale spaghetti squash

spaghetti squash. what a concept. i never really got the hype... until i made this beauty. and now, here we are, and i'm enlightened so much so that i'm sharing it with you.

sausageandkalesquash

this is addicting - i think we made it twice in one week because we liked it so much! it definitely became a staple in our rotation for colder weather days and when we wanted something hearty but still super healthy.

try it - you won't regret it!


sausage + kale spaghetti squash

ingredients | serves four

  • 1 spaghetti squash
  • 1 lb italian chicken sausage
  • 1 tbsp olive oil
  • 2 cloves garlic, minced
  • 1/2 cup onion, chopped
  • 1 cup kale, stems removed and chopped
  • 1 tbsp pine nuts

instructions

  1. preheat your oven to 450.
  2. prep your spaghetti squash. microwave for 4-5 minutes, then cut open length wise with a very sharp, large knife. do NOT hurt yourself. enlist a strong person to help you on this one.
  3. place both halves cut side up on a baking sheet. drizzle with olive oil and plenty of salt and pepper.
  4. roast at 450 for 50 minutes. 
  5. in the meantime, prep your veggies. chop your garlic and onion; remove the stems and chop your kale. don't skip removing the stems - they taste AWFUL. trust me.
  6. grab your spaghetti squash once it's done roasting. scoop out the "noodles" from the skin and place in a bowl to cool.
  7. heat olive oil in a medium pan. sauté your garlic and onion, 3-5 minutes.
  8. add in the chicken sausage, breaking it up with a wooden spoon into smaller pieces. 
  9. add in your kale until wilted.
  10. finally, incorporate spaghetti squash and toss to combine.
  11. top with pine nuts and extra black pepper. serve and prepare to be converted to a spaghetti squash lover!

make this next time you have a rainy, lazy day. it's kind of no fun waiting that long for it to bake, teasing you with the yummy smells and promises from me of tasting delicious, but if you anticipate ahead of when hunger strikes, it's way worth the planning.

hope you love it!

xoxo, #chefhaley

seared ahi tuna with fresh chimichurri

this recipe kind of snuck up on me. i'm not really experienced with cooking fish; the whole kit and caboodle kind of intimidates me. but this recipe looked fairly straightforward, simple, and fresh. and once i plated it, i thought to myself, i really made this? someone like me couldn't have made this...

ahituna

but here we are ladies and gents, i did make it and i'm so glad. it was SO easy, i promise you that. sometimes fresh, simple ingredients can really yield the best results and make you feel like a total rockstar in the process.

seared ahi tuna with fresh chimichurri (adapted from here)

ingredients | serves 2

tuna:

  • 1 lb sushi grade tuna steak
  • 1 avocado
  • 6oz fresh arugula

chimichurri:

  • 1/4 cup extra virgin olive oil
  • 1/4 cup chopped cilantro
  • 1/4 cup chopped red onion
  • 1 jalepeño
  • 1.5 tbsp sherry vinegar
  • 1 tbsp chopped basil
  • 1 tbsp chopped parsley
  • 2 garlic cloves, minced
  • 1 tsp chopped thyme
  • 1 tsp red pepper flakes
  • pinch of cayenne pepper
  • salt & pepper to taste

instructions

  1. combine all chimichurri ingredients and set aside while cooking the tuna. this will help the flavors blend. 
  2. season both sides of the ahi tuna liberally with salt and pepper
  3. heat two tablespoons of olive oil in a nonstick pan over high heat. 
  4. sear the tuna about 2 minutes each side. *this will reflect the rareness in the photo above, don't freak - keep in mind if you buy sushi grade, it's meant to be eaten rare!
  5. once tuna has been seared, transfer to a cutting board and slice thinly.
  6. in a medium bowl, toss half of the chimichurri with the arugula and place on the plate.
  7. top arugula with thinly sliced ahi, half of an avocado, and the rest of the chimichurri.

i know the weather is teasing us for summer right now - this is perfect for those breezy, outdoor late summer dinners with a copious amount of white wine and dessert, and it takes all of 15 minutes to get together. more time for wine, am i right?

hope you love it! 

xoxo, #chefhaley


black bean burrito bowls

aka, chipotle at home. on your couch. in front of the NBA playoffs or recordings of nashville. tell me who doesn't love that.

black bean burrito bowls

i'm not going to lie to y'all - we probably make these about once every 10 days on average. the salsa. the. salsa. i eat it out of the bowl. i just can't help myself.

next time you're craving some mexican, don't worry your pretty little head - just turn to this recipe and all your dreams will come true. don't be intimidated by the long ingredient list - you probably have most of this around.


black bean burrito bowls

ingredients | serves two + leftovers

cilantro lime brown rice

  • 1/2 cup dry brown rice
  • 1 cup water
  • pinch of salt
  • juice of 1/2 lime
  • 1 tsp olive oil
  • 1 tbsp chopped fresh cilantro

corn & tomato salsa (THE salsa, you guys)

  • 1/2 cup corn (fresh, frozen, canned, your choice)
  • 2 tbsp chopped red onion 
  • 1 1/2 tbsp lime juice
  • pinch of salt
  • 1 small tomato, chopped or 10-15 grape tomatoes, halved
  • 1 small jalepeño, seeded and finely chopped (keep the seeds in there for a hot version)
  • 1 garlic clove, minced
  • 2 tbsp chopped fresh cilantro

black beans

  • 1 tbsp olive oil
  • 1/2 cup chopped onion
  • 2 garlic cloves, minced
  • 2 scallions, chopped
  • 1/4 cup chopped bell pepper
  • 1 tsp red wine vinegar
  • 1 (150z) can black beans, drained and rinsed
  • 1 bay leaf
  • 1/2 tsp cumin
  • 1/4 tsp dried oregano
  • pinch of salt and black pepper

toppings

  • shredded cheese
  • avocado
  • pickled jalepeños for more heat
  • sour cream or nonfat plain greek yogurt
  • salsas of your choice
  • the list goes on and on...

instructions

  1. For the rice: put your water and salt into a pot and bring to a boil. place rice in boiling water and cook according to the package directions. once rice is fully cooked, combine with the olive oil, lime juice, and cilantro. toss well and set aside.
  2. for the salsa: combine all ingredients listed under salsa and let it sit to blend the flavors while you finish cooking.
  3. for the beans: heat a medium sauce pan over medium heat. add your olive oil, onion, garlic, scallion, and bell pepper and sauté until soft, 3-5 minutes. add 1/2 cup water, vinegar, beans, bay leaf, and spices and bring to a boil. reduce to a simmer, stirring occasionally, until liquid dissolves. remove bay leaf.
  4. for the finale: plate your rice (1/2 cup), beans (1/2 cup), then top with your homemade salsa (1/4 cup). finish with avocado, cheese, and anything else your heart desires.

this is a staple in our household. i truly think i don't think i'd be able to survive without knowing that we pretty much have all of the ingredients on hand at all times to make it. it's a survival tactic.

hope you and yours enjoy it just as much as we do!

xoxo, #chefhaley


baked berry oatmeal

well you guys, i'm not going to beat around the bush on this one. this recipe is probably the easiest recipe on this website... AND it gets an A++++ from #chefhaley and her official taste tester. it's so ridiculously easy, healthy, and delicious - it's a complete no brainer when you're wanting something on the sweet side for breakfast. it's great for groups and brunches, too, because you can reheat it on the go! i truly can't say enough good things about it.

bakedoatmeal.jpg

you can use any kind of fruit you'd like or you could switch the rolled oats for steel cut if that's your thing. either way, this is a recipe on my sweet breakfast rotation that is staying for a while.

baked berry oatmeal (adapted from here)

ingredients | serves 6

  • 1 cup rolled oats
  • 1/4 cup chopped pecans
  • 1/2 tsp baking powder
  • 1 tsp cinnamon
  • pinch of salt
  • 1 cup unsweetened almond milk
  • 1/4 cup maple syrup (you could also use honey)
  • 1 large egg
  • 2 tbsp unsalted melted butter, cooled
  • 1 tsp vanilla extract
  • 1 cup blueberries (or any other fruit)
  • 2-3 ripe bananas

instructions

  1. preheat your oven to 375 degrees. lightly grease an 8x8 square dish or 2-quart baking dish.
  2. combine rolled oats, half of the pecans, cinnamon, baking soda, and salt in a medium bowl.
  3. combine maple syrup, almond milk, egg, melted butter, and vanilla in a medium bowl and whisk until incorporated.
  4. slice bananas and spread them in a single layer on the bottom of your baking dish. 
  5. top bananas with half of your berries.
  6. sprinkle dry ingredients, then pour your wet ingredients evenly on top.
  7. finish with the rest of the berries and the other half of the chopped pecans.
  8. bake for 35-45 minutes until golden brown on top. let cool for 10 minutes before serving!

can't wait for y'all to try this one! let me know what you think!

xoxo, #chefhaley

simple, fast, & easy flatbreads

similar to my greek night post, sometimes i just don't feel like bringing out the big guns in the kitchen, but still want something super delicious. idealistic? maybe. but that's where these too good to be true flatbreads come in.

flatbreads

this is one of those recipes that you can whip together in 10 minutes, tops. i love, love recipes like that. keeping it simple and easy is what everyone wants, am i right?

you could be super into this and make your own pizza dough - i will admit to you, i am not one of those people. maybe on a weekend. but on a weeknight, when i have things to do (aka, when i want to watch my DVR episodes of empire and pour over my new real simple issue), store bought will do just fine.

ingredients | makes two individual flatbreads

  • 1/2 package of store bought pizza dough
  • 1/2 cup cornmeal
  • wax paper
  • 1 tbsp olive oil
  • 1/4 cup cooked chicken, chopped
  • 1/4 cup pesto
  • 1/4 cup pizza sauce
  • 1/4 cup shredded mozzarella
  • 1/4 cup shredded parmesan
  • 1/4 cup basil, chopped

instructions

  1. place your pizza dough out on the counter for at least 30 minutes before cooking. 
  2. preheat your oven to 450. 
  3. spread out your cornmeal on a sheet of wax paper on your counter.
  4. split your dough in half, then in half again. put the first half back in the fridge. 
  5. place your two pieces of dough on the waxed paper, rolling in the cornmeal until it's all covered.
  6. work your dough. i work each section for about 5-8 minutes until it's thin, but not thin enough that it breaks. 
  7. once your dough is done, place on a greased baking sheet. top each with 1/2 tbsp of olive oil.
  8. spread one with the pesto, chicken, and both cheeses.
  9. spread the other with the pizza sauce, both cheeses, and basil. 
  10. place in the oven and bake for 10 minutes.

wasn't that easy? they're seriously lifesavers when i need something quick and easy to whip up, and most of the toppings i have on hand. feel free to do yours differently - all you need are the basics to get started on your own combination!

til next time,

xoxo, #chefhaley 

salsa verde turkey burgers + no fry fries

you guys. these burgers are so dangerously good. they make me want to give up other burgers all together. and the fries?! i can't even talk about them. i'm literally craving them as i type this sentence. i am a french fry devotee and these baked ones are worthy of their own food group.

salsaverdeturkeyburgers

the salsa verde gives these burgers a great flavor and moisture that ground turkey really needs. i do these bun-less to save calories & top with low fat pepper jack cheese, more salsa verde, and pickled jalapeños, cause i like it spicy. you can also serve with a side of avocado to add some healthy fat to the mix... and well, because you can.

the fries are so simple - russet potato + olive oil + salt and pepper + an oven, and you've got yourself homemade fries. i first saw these in gwyneth paltrow's first cookbook and have been making them as a healthy side ever since.

ingredients | makes four turkey burgers + two servings of fries

turkey burgers

  • 1 lb ground turkey
  • 1 egg
  • 1/4 cup breadcrumbs
  • 1/2 cup salsa verde + extra for topping
  • 4 slices low fat pepper jack cheese
  • pickled jalapeños, cabbage, avocados, tomatoes, cilantro, green onion - the topping list goes on and on!

no fry fries

  • 1 russet potato
  • 1 tbsp olive oil
  • pinch of salt + fresh ground pepper

instructions - turkey burgers

  1. mix together ground turkey, egg, breadcrumbs, and salsa verde in a bowl. 
  2. separate into four even servings. mold into patties.
  3. spray your grill pan and grill on each side for about 7 minutes each. while grilling, use two spatulas to press the patties together and keep them intact. 
  4. after you've flipped after your last 7 minutes, top with a piece of pepperjack cheese and let grill until melted on top.
  5. place on plate and top with toppings!

instructions - no fry fries

  1. heat oven to 450 degrees.
  2. cut potato in half horizontally; cut evenly into 1/3 inch pieces. 
  3. place in a bowl of cold water for about 30 seconds to a minute.
  4. remove from water and dry thoroughly. i usually let mine sit and air dry a bit - these do best when they are completely dried.
  5. toss with olive oil, salt, and pepper.
  6. place on baking sheet. 
  7. bake for 25 minutes, turning occasionally. i usually set my timer for 15 minutes, flip, and then put them back in for the remainder of the time.

these burgers and fries are completely guilt free but in such a sneaky way. make them for game day, or the first day of spring, or even year round - you can always make an excuse for this kind of burger.

til next time,

xoxo, #chefhaley

homesick texan carnitas

mexican food is probably my kryptonite. i could eat it every single day, for every single meal, and never even get a little bit sick of it. whenever i get asked my favorite food, i have a really hard time not saying tortilla chips, or salsa, or guacamole, or pollo asado... or all together, also known as a burrito.

carnitas

i found these lovely carnitas on smitten kitchen's website a long time ago; i've made them maybe a dozen times by now. i love deb's blog, and if she can cook these in her tiny nyc kitchen, there's no reason for me (or you!) not to try. these pretty much cook themselves, but feign hours over the stove and please any crowd.

sidenote: the green onion slaw below is almost just as good as the carnitas. if you have the time, do yourself a favor and make it. it’s worth the extra work.

——

homesick texan carnitas | via smitten kitchen

ingredients | serves a group of very hungry people, or a bigger group of moderately hungry people, or two people with a ton of leftovers

for the pork:

  • 3lbs boneless pork shoulder (also known as pork butt), cut into 2 inch cubes

  • 1/2 cup orange juice

  • 1/4 cup lime juice (about 2-3 limes)

  • 5 cloves garlic, peeled and crushed

  • 1 tsp ground cumin

  • salt & pepper to taste

for the green onion slaw:

  • 1 cup coarsely chopped green onion

  • 1/4 cup red wine vinegar

  • 1 jalapeño, seeded and roughly chopped

  • 2 tablespoons nonfat plain greek yogurt

  • tiny pinch of fine sugar

  • 1/2 cup olive oil

  • 3 cups shredded red cabbage

  • 1 small red onion, chopped

  • chopped cilantro to taste

  • salt & pepper to taste

for serving:

  • corn tortillas (or flour if that’s your thing)
  • green onion slaw (recipe below)
  • sour cream
  • avocado
  • tomatoes
  • cilantro
  • anything but the kitchen sink, pretty much

instructions - pork

  1. trim your pork of the “bad fat” (this is the white, hard fat - keep the white, soft stuff - it will cook down over time) and cut your pork into two inch cubes.

  2. place pork into your dutch oven or large, heavy bottomed pot (for the record - i’ve done both, and they both work, but dutch ovens are a better choice between the two.) add the orange juice, lime juice, garlic, cumin, salt, pepper, and just enough water to barely cover the pork. 

  3. bring your dutch oven to a boil and then lower to a simmer. simmer for two hours; don’t touch your meat. (sometimes, my liquid will reduce faster than the two hours - if this happens, turn down your heat and just add some more water and a little more OJ. the meat needs those full two hours to get tender.)

  4. after two hours, increase the heat to medium-high and continue to cook until liquid is reduced, occasionally stirring. this can take anywhere from 20-30 minutes. during this time, i’ll make the green onion slaw.

  5. once the liquid is reduced, let the pork sizzle in the remaining fat and brown on both sides. it should be falling apart pretty easily and only take a few minutes.

  6. once it’s browned on both sides, you’re all done with the pork!

instructions - green onion slaw

  1. combine green onions, red wine vinegar, jalapeño, greek yogurt, pinch of sugar, salt, pepper, and olive oil in a blender. (i use my nutribullet for this! works like a charm.)

  2. place cabbage and onion in a bowl; toss dressing to combine and add cilantro and additional salt & pepper if needed.

instructions - serving

  1. warm your tortillas (flour or corn) in the microwave for about 10 seconds.

  2. spread a little sour cream on one side each tortilla. this will help the carnitas stick to something (pro tip!)

  3. fill your tortillas with the carnitas - don’t fill it up too much, or the toppings won’t fit!

  4. top next with green onion slaw, then tomatoes, chopped cilantro, pickled jalapeños, and finally a scoop of avocado.

i know this looks like a lot of work, but it’s deceiving, i promise. i remember making this and feeling like i conquered the world - little old me, making carnitas that are this amazing? it's pretty empowering. you too will feel it as soon as you take your first bite.

til next time!

xoxo, #chefhaley